“Repy Tracker for MailWizz EMA” Documentation by “TurnSAAS” v1.0
“Repy Tracker for MailWizz EMA”
Created: 2/09/2020
By: TurnSaas
Email: mailwizz@turnsaas.com
Thank you for purchasing my extension. If you have any questions that are beyond the scope of this help file, please feel free to email via my user page contact form here. Thanks so much!
Table of Contents
- Descripton
- Features
- Requirements
- Installation
- Configuration
- Customer Guide
- Question/Support
- API
- Sources and Credits
A) Description - top
Dedicated Reply Tracker for MailWizz EMA
Build Great Simple Funnel !, Know who respond to your campaign, when they respond and most especially take action (separate them from others and easily follow up)
This extension enables reply/response tracking for your MailWizz EMA powered
application!
Since MailWizz EMA email
box monitor dont give stat about responses from campaign likewise risk of deleting mails if not well
configured, things could have been better if we could know who reply ,when they reply and which campaign
they reply to.
This extension aims to alleviate this and provide you simple tool to follow up with your active
subscribers.!
Simple scenario is sending a campaign to a listA gotten from somewhere not too trusted, you send campaign to
listA, you got some response, and you copy listA member that reply to listB (interested active subscriber
list). Then you can easily follow up with listB; and you have higher chance of success as they reply
already.
With v2.1.3, you can now update subscriber field on new replies. Also, there are dedicated tags REPLY_TRACKING_PIXEL (for plain text); masking should not be a problem henceforth with the use of this tag. If your server is not masking, [UNSUBSCRIBE_URL] tag only is sufficient.
B) Features - top
- Track response from any campaign using campaign subject and unsubscribe url or tracking pixel
- Insert [REPLY_TRACKING_PIXEL] or [REPLY_TRACKING_PIXEL_PLAIN] as needed in a campaign to track the responses
- Detect active subscriber through response
- Select actions to be executed when customer respond
- Auto Follow up message (with support for all campaign and subscriber fields tags) to be sent when a subscriber respond
- Make new list of responding subscribers by copying/moving subscriber to specific list when they reply
- Download/Export responses from subscribers
- Autoresponses and out of office mails filters; so you get mostly real reply from real human.
- Unlimited number of inbound server
- Create Inbound server from existing email monitors
C) Requirements - top
- This is addon for MailWizz EMA and requires you to have setup MailWizz EMA
- Cron Cron is needed to run job at intervals. You should already have this if running MailWizz already
- IMAP/POP3 Extension enabled You will have this, especially if you once use MailWizz email box monitor
- Mail Servers with english headers (not mail body or content) which most mail provider use by default.
D) Installation - top
- Extract the main file you download from Codecaynon
- Login in the backend of your MailWizz EMA powered website and navigate to Extensions menu.
- Hit the upload button and select the extension archive (reply-tracker.zip) from the folder where you extract downloaded file from Codecanyon to, Then click upload.
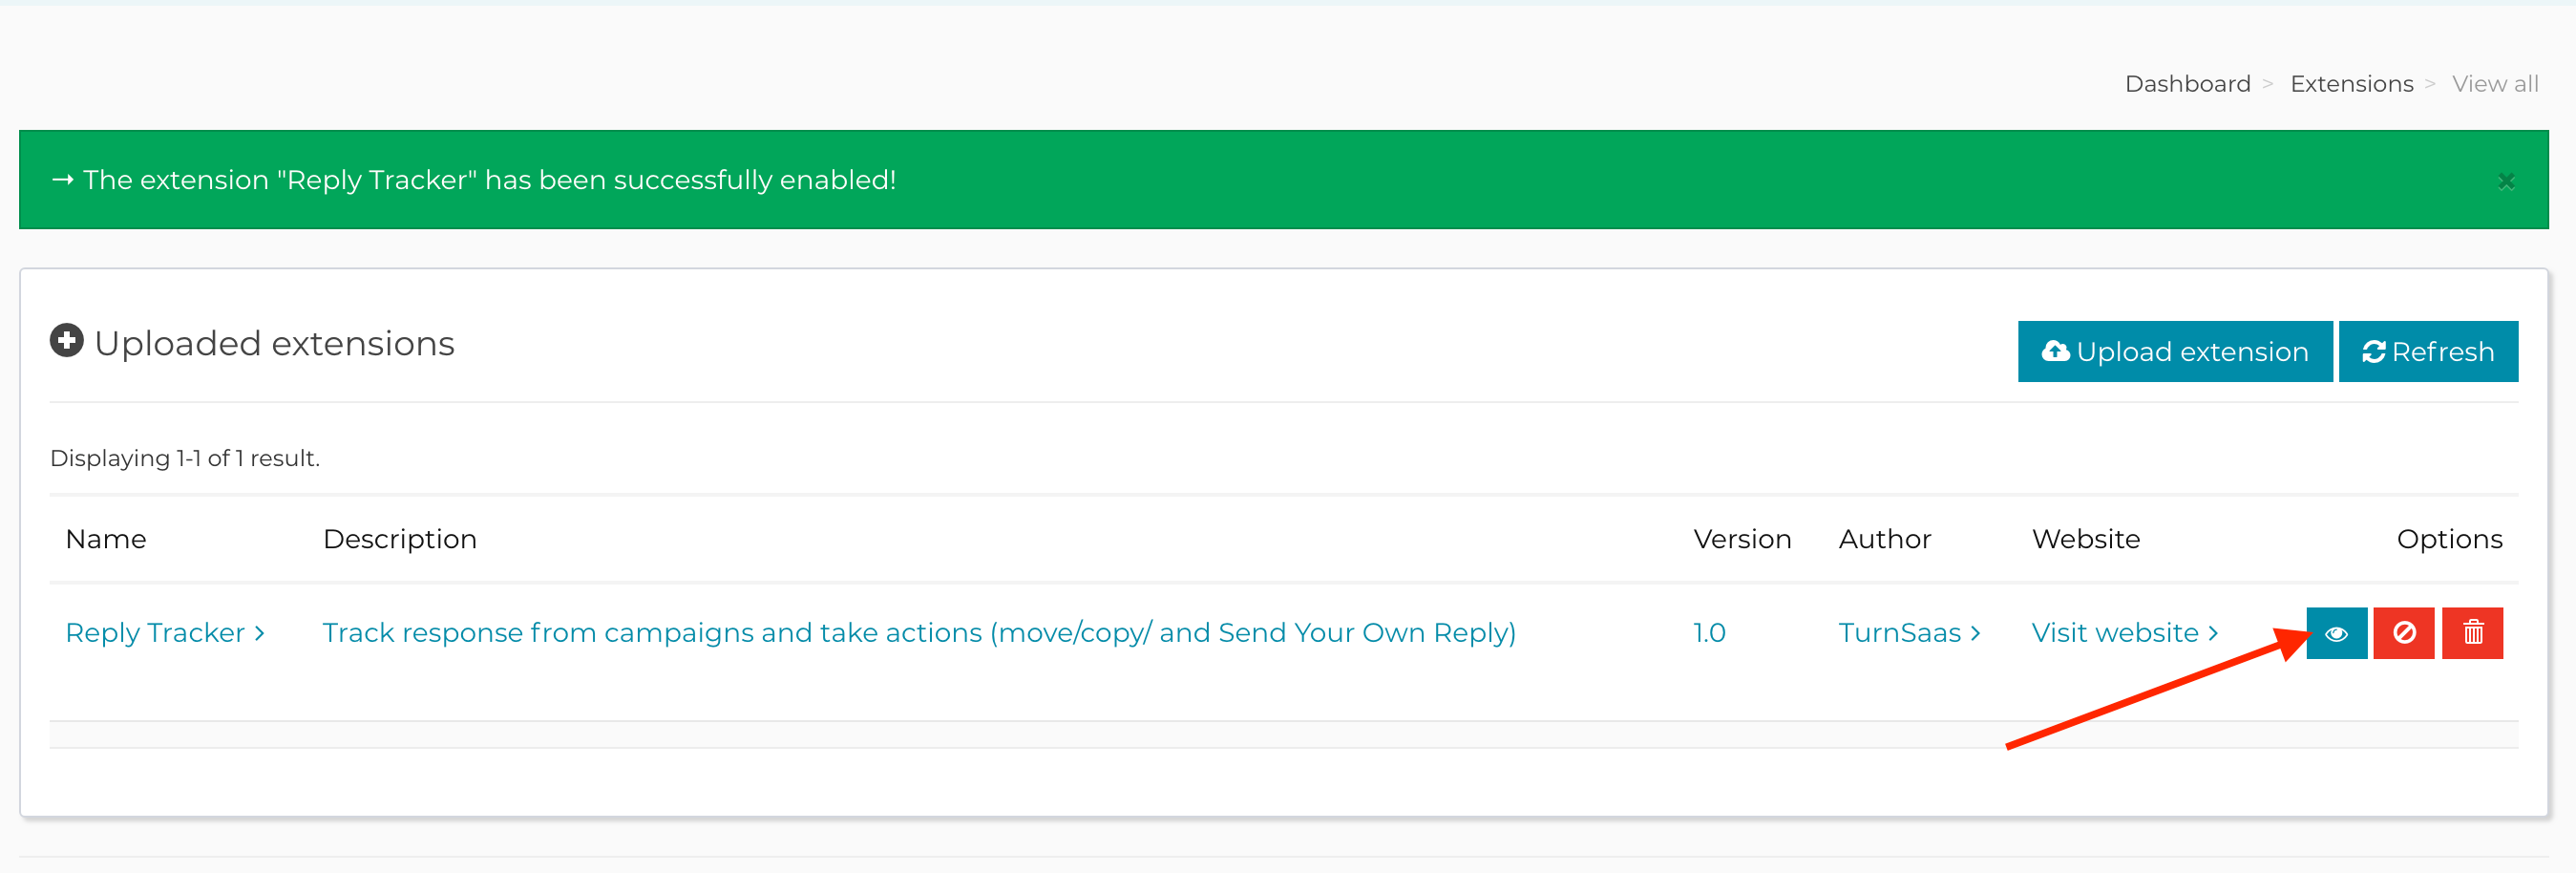
-
Enable the extension then click on it's title/eye icon to go to the extension page from where you can
setup reply tracking for your system.
E) Configuration - top
- After the extension is enabled, visit extension page by clicking on the eye icon from the extension
action buttons
Enable Reply Tracker on the extension page itself by setting Enabled to yes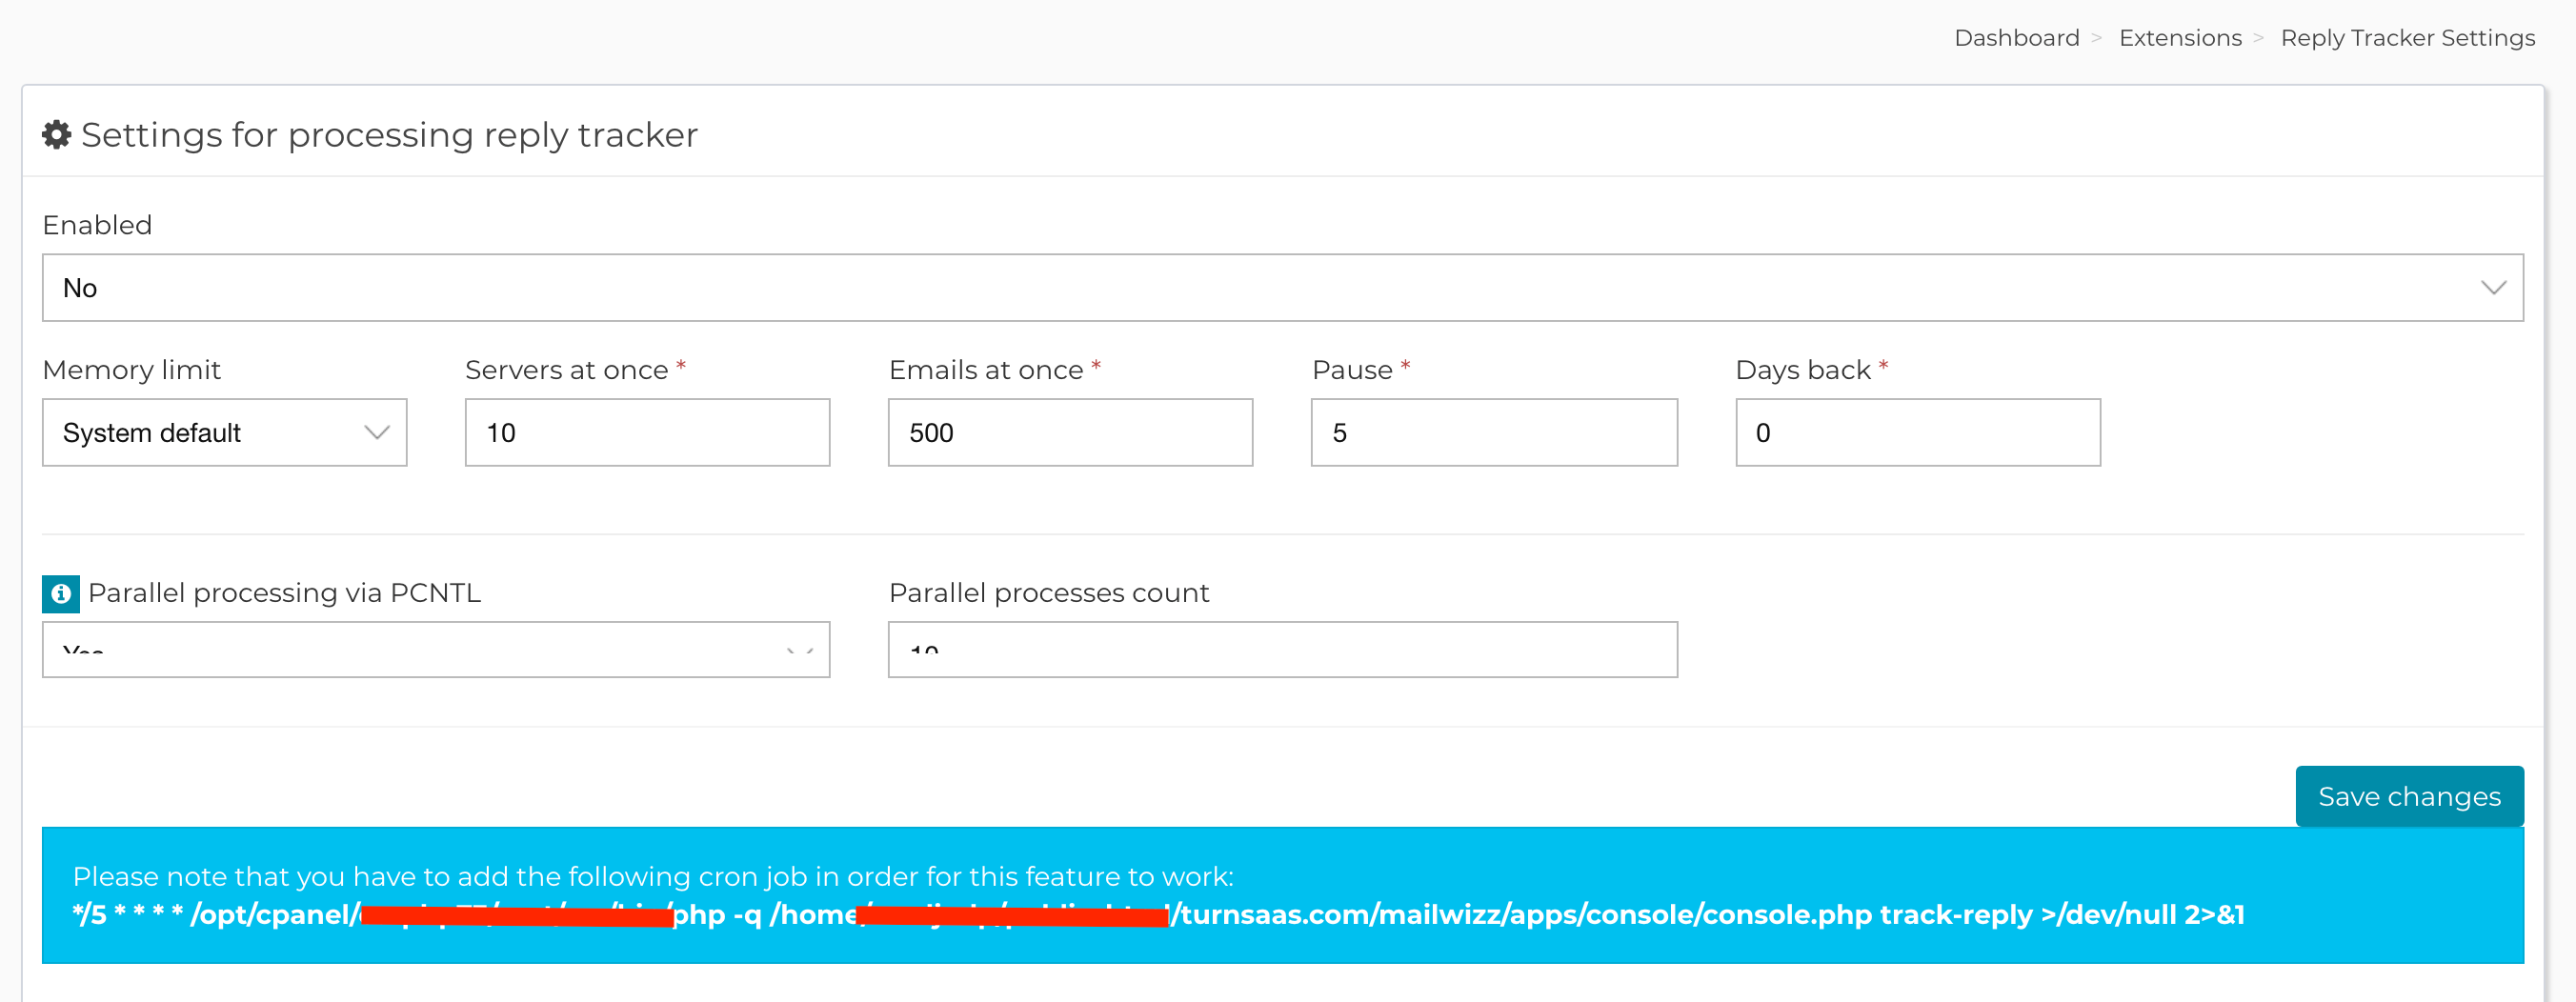
-
Setup desire configuration. Click on each input for guide and description. Keep Days back to 0 or as low
as possible for optimal perfomance if you run on low servers.
0 Day back mean only fectch replies for current day.
When strict level is set to high, make sure your campagn subjects dont have special characters as full subject matching is done in strict level of "high". - Add Cron job as shown on the extension page. This is required for this extension to work properly.
If you are using cpanel, follow this link for how to add cron https://help.fasthosts.co.uk/app/answers/detail/a_id/2198/~/setting-up-cron-jobs-in-cpanel
You will have something close to this if you keep it at every 5 minute: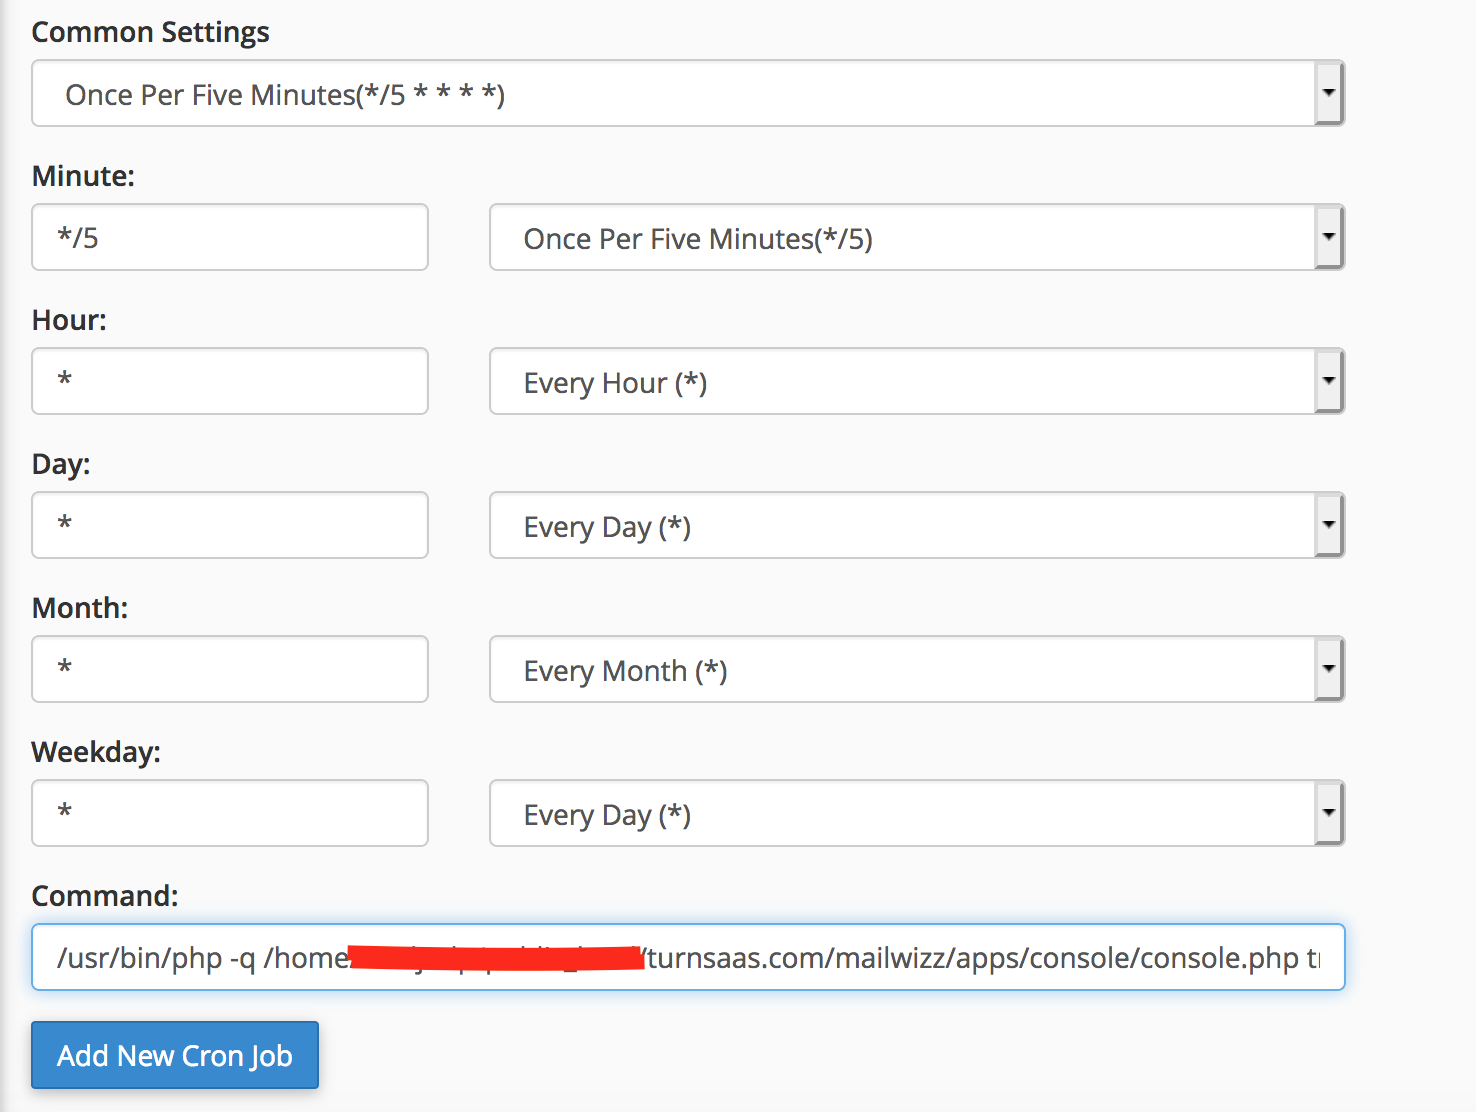 Adjust to suit your need depending on rate of use and server resources. Every minute with give prompt
result.
Adjust to suit your need depending on rate of use and server resources. Every minute with give prompt
result.
F) Customer Guide - top
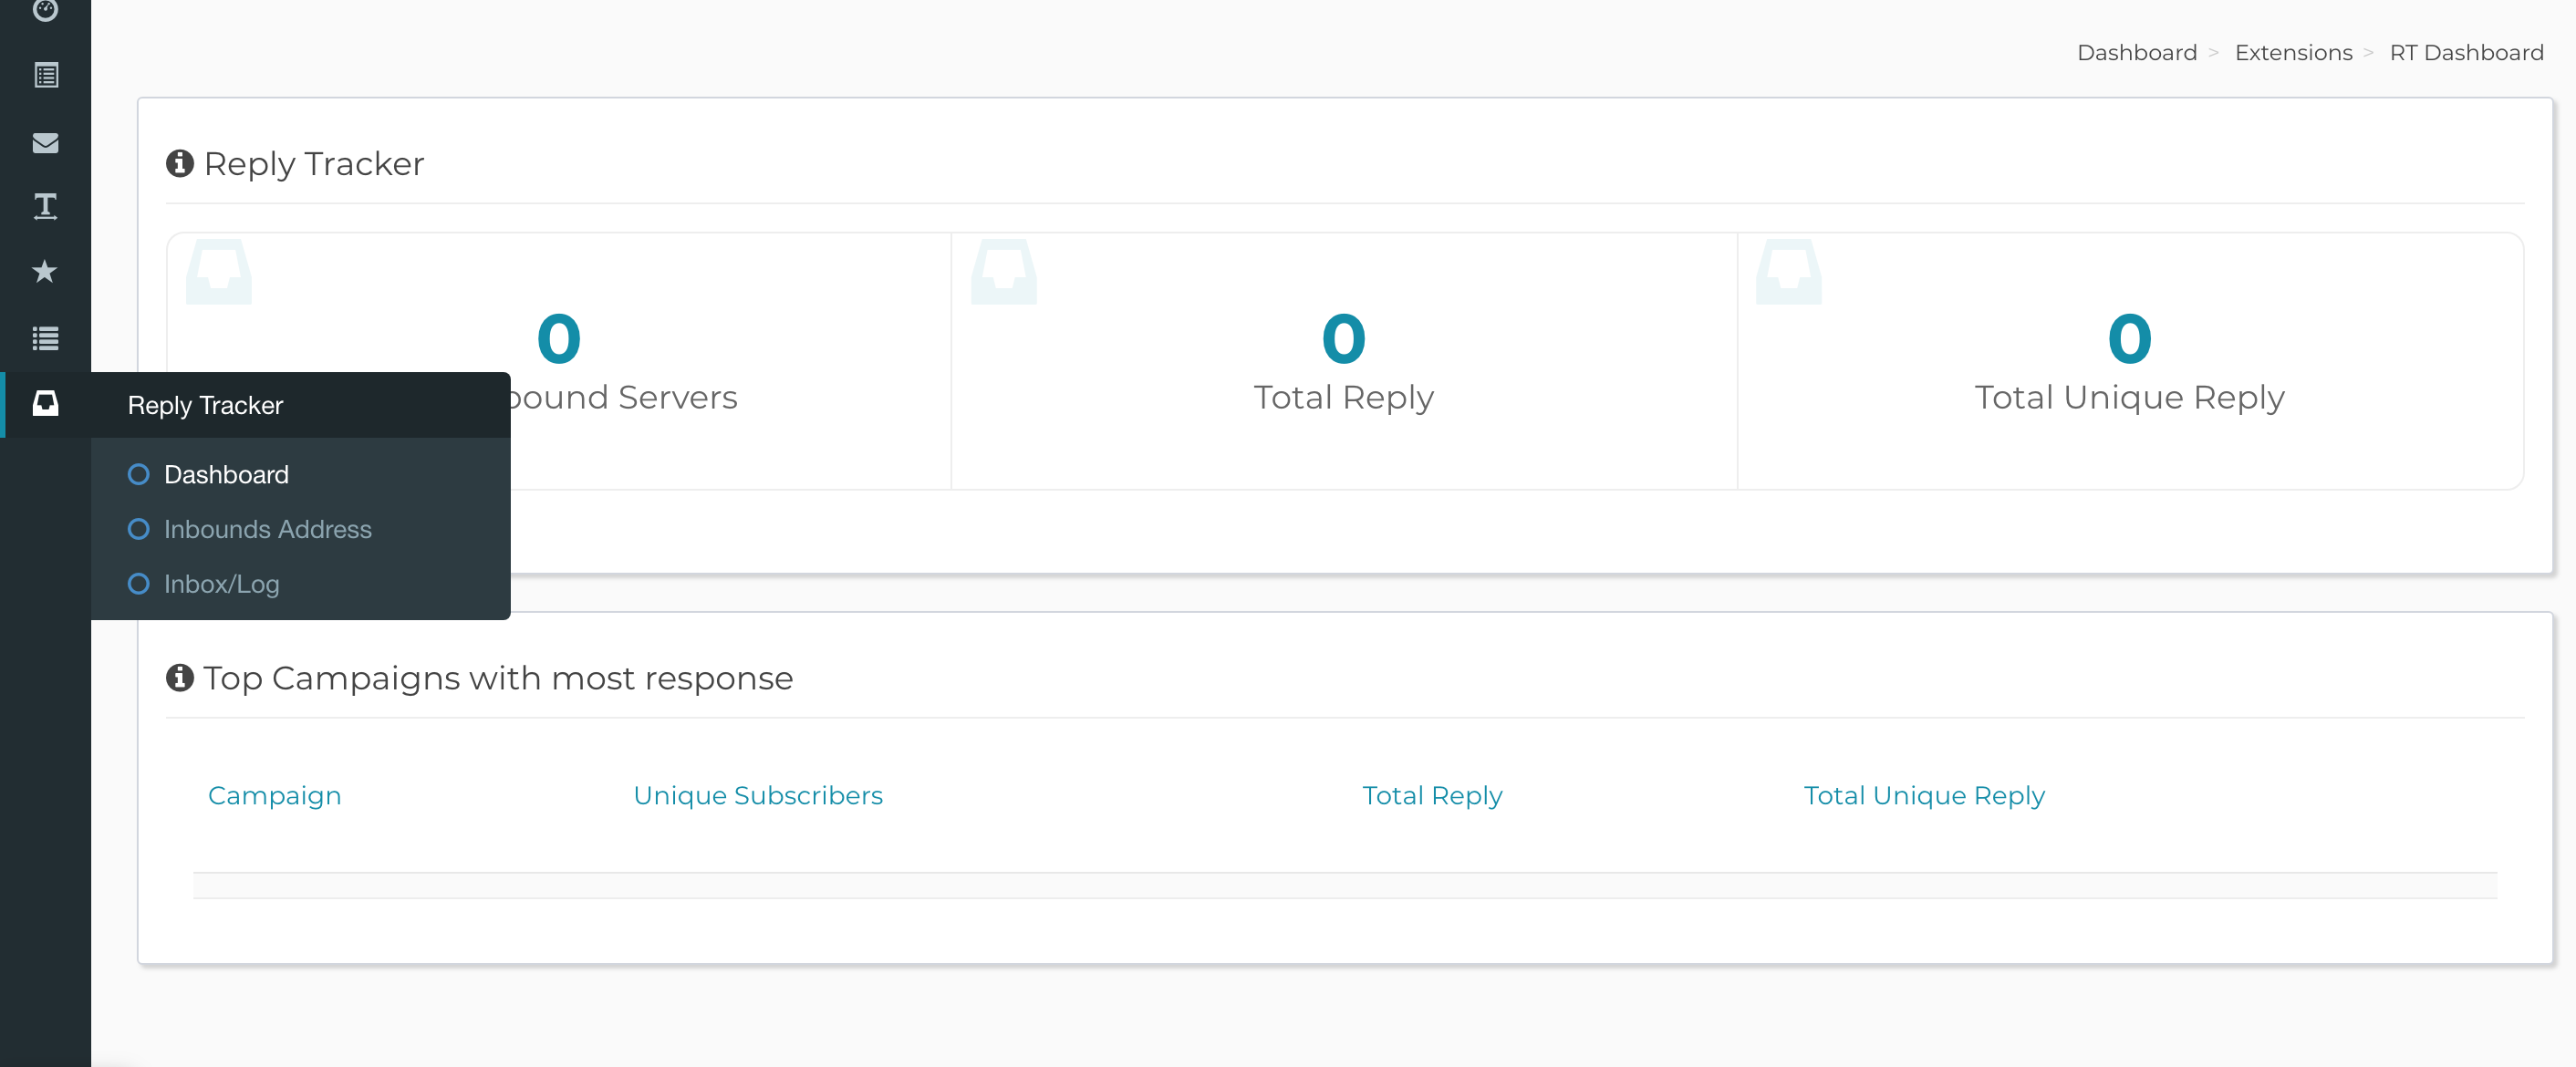
- After extension is enabled by admin, you will see new menu on left-side side menu 'Reply Tracker'
- Click this to reveal 3 submenus; 'Dashboard', 'Inbound Address' and 'Inbox/Log'
- Click Dashboard to show overview reply tracker and top campaigns with highest response
 'Inbound Address' submenu allow you to add reply tracking address to be used in campaign 'Reply To
field' , you can easily import addresses from your email box monitor in single click.
'Inbound Address' submenu allow you to add reply tracking address to be used in campaign 'Reply To
field' , you can easily import addresses from your email box monitor in single click.
The email address used in the username field is to be used as 'Reply To' address when creating your campaign. Here, you can also setup action (what need to be done) when subscriber respond to your campaign.
If you have email-box-monitor server, an option to create a new inbound from the email-monitored will be presented.
When setting up action, remember to click on the left check box near each action to enable the action
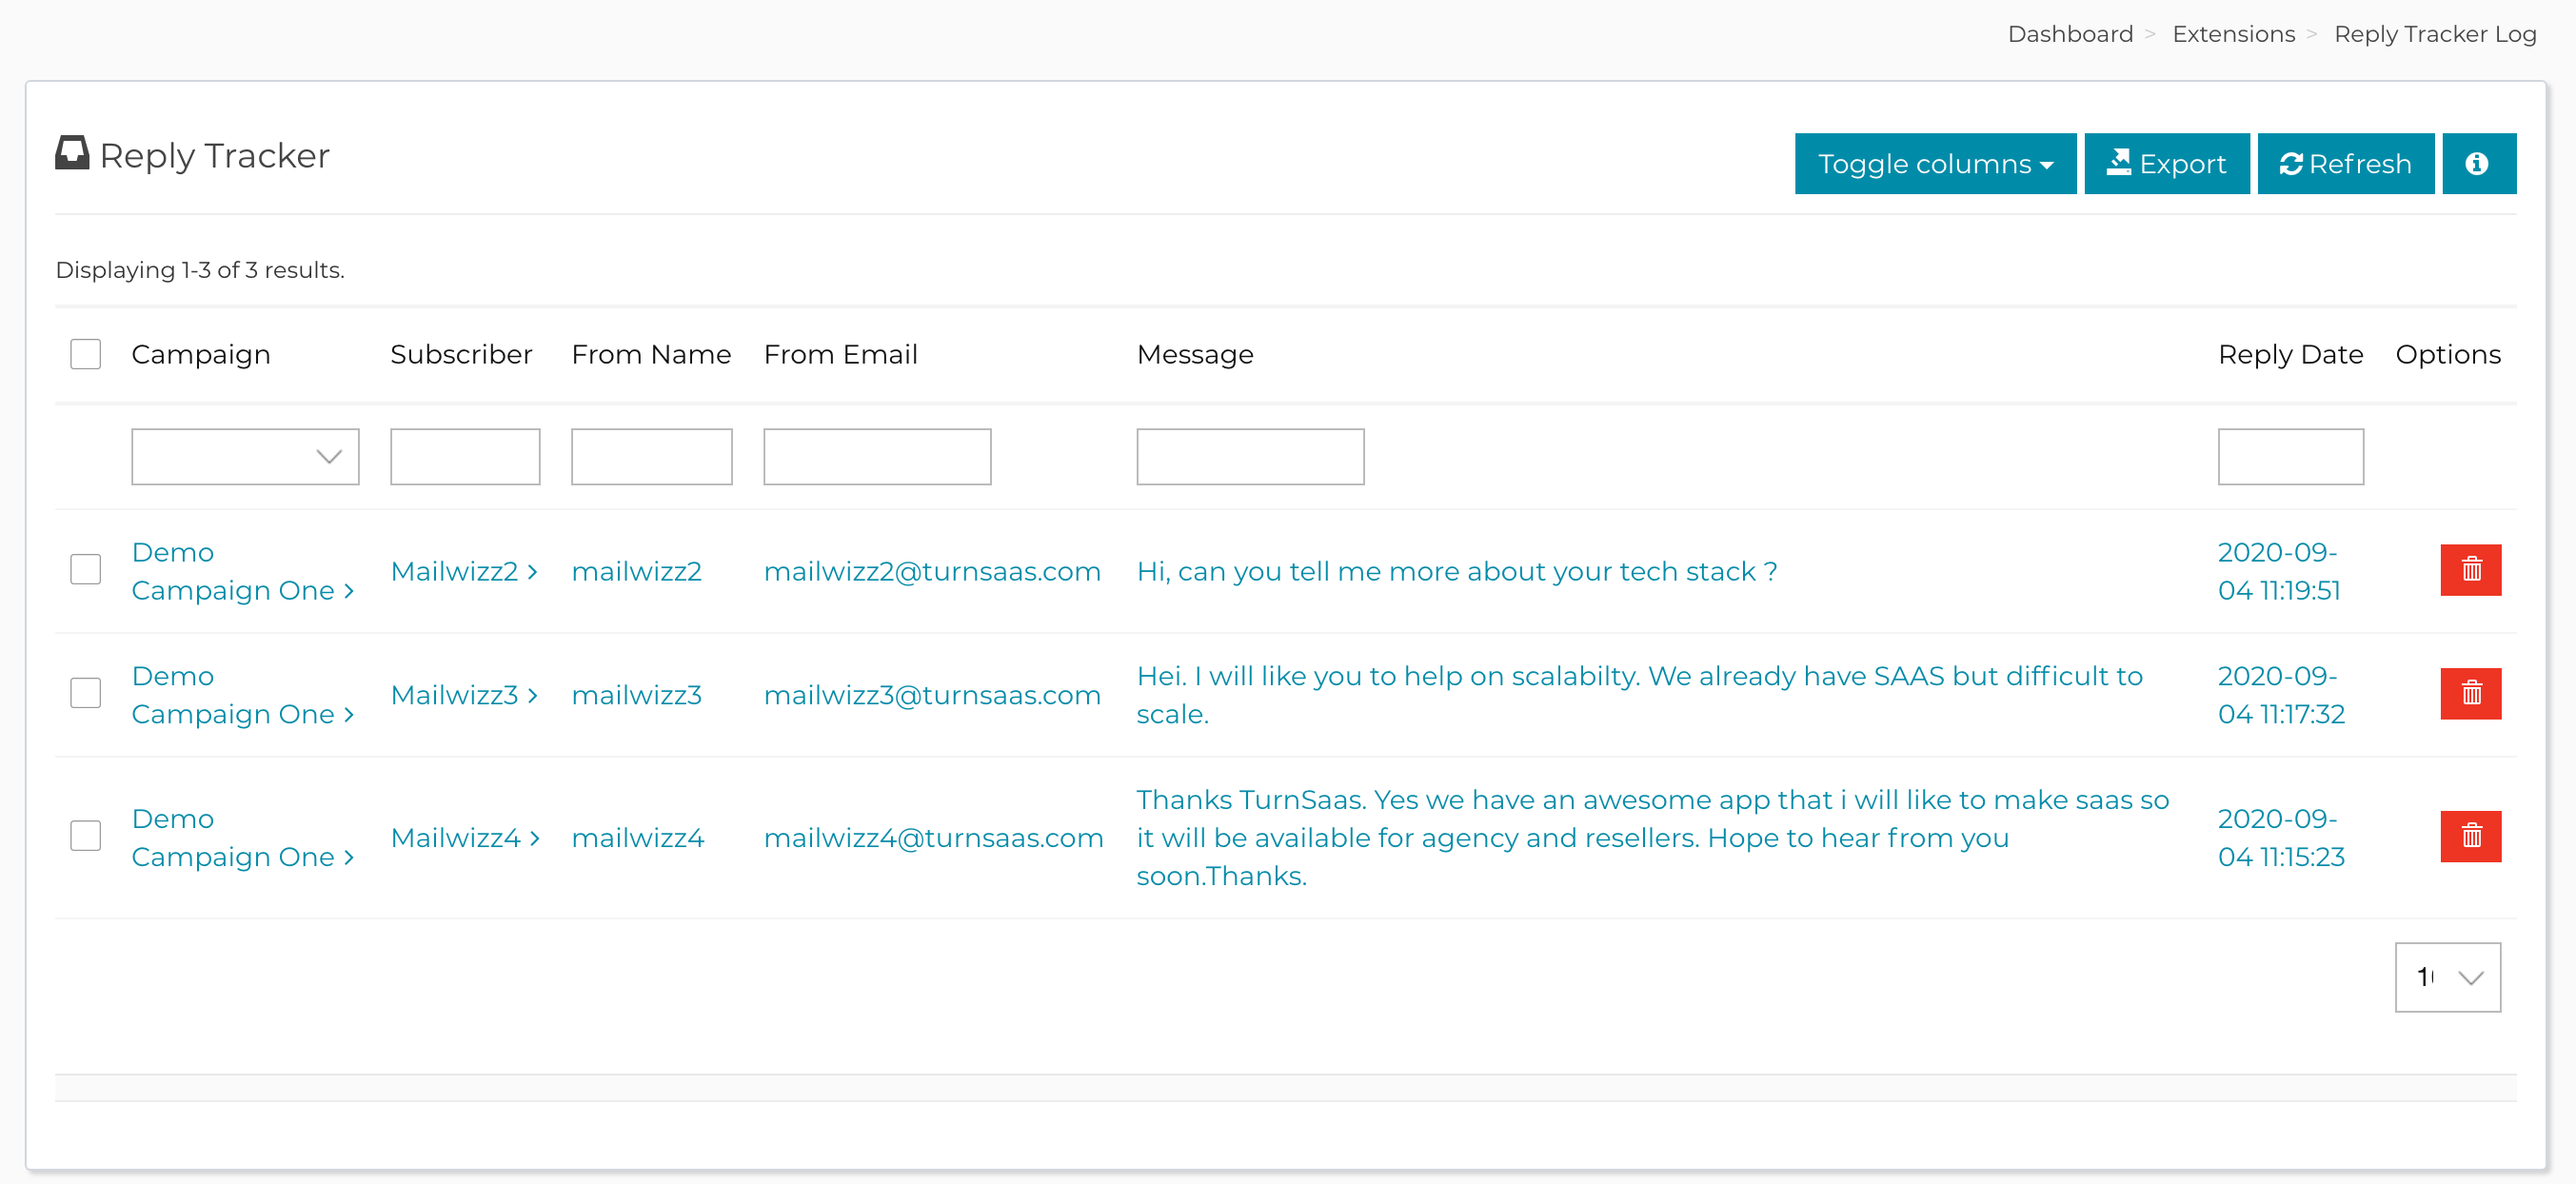
Each input box is provided with hint and description to guide you on what is required.- 'Inbox/Log' submenu provide option for seeing the replies to your campaigns. Here you can filter, and
export log.
G) Question/Support - top
- MailWizz EMA from version 1.3.3.1 to latest version is required
- We provide documentation with video illustration covering installation and usage.
- We respond to your questions as fast as possible within few hours.
- We dont provide refund for the extension after purchase, so confirm before purchase.
- Any custom work including setup, installation and extension (that might require skilled hours) are not free. You can hire us for this.
- We dont take responsibility for smtp connection issue as this is highly dynamic and beyond our scope.
- We read your inbound server mails only. No mail will EVER be deleted
H) API - top
- The extension comes with mini api where you can read basic statistic about the reply traking
- The endpoint is available on https://yourdomain.com/api/index.php/reply_tracker/index .
Call it like other mailwizz api with your API key on the header. See mailwizz api doc. - Sample response:
                    {
                        "status": "success",
                        "data": {
                            "total_inbounds": {
                                "count": 1,
                                "url": "/mailwizz/api/index.php/reply_tracker/inbounds"
                            },
                            "total_reply": {
                                "count": 1,
                                "url": "/mailwizz/api/index.php/reply_tracker_log/index"
                            },
                            "total_unique_reply": {
                                "count": 1,
                                "url": "/mailwizz/api/index.php/reply_tracker_log/index"
                            },
                            "most_replied_campaign": [
                                {
                                    "name": "demo #1",
                                    "campaign_uid": "az366r0kdo023",
                                    "campaign_id": 39,
                                    "total": 1,
                                    "total_unique": 1,
                                    "total_subscribers": 1
                                }
                            ]
                        }
                    }
F) Sources and Credits - top
- MailWizz EMA
Once again, thank you so much for purchasing this addon. As I said at the beginning, I'd be glad to help you if you have any questions relating to this addon. No guarantees, but I'll do my best to assist. If you have a more general question relating to the addon, you might consider visiting the item page and asking your question in the "Item Discussion" section.
TurnSaas